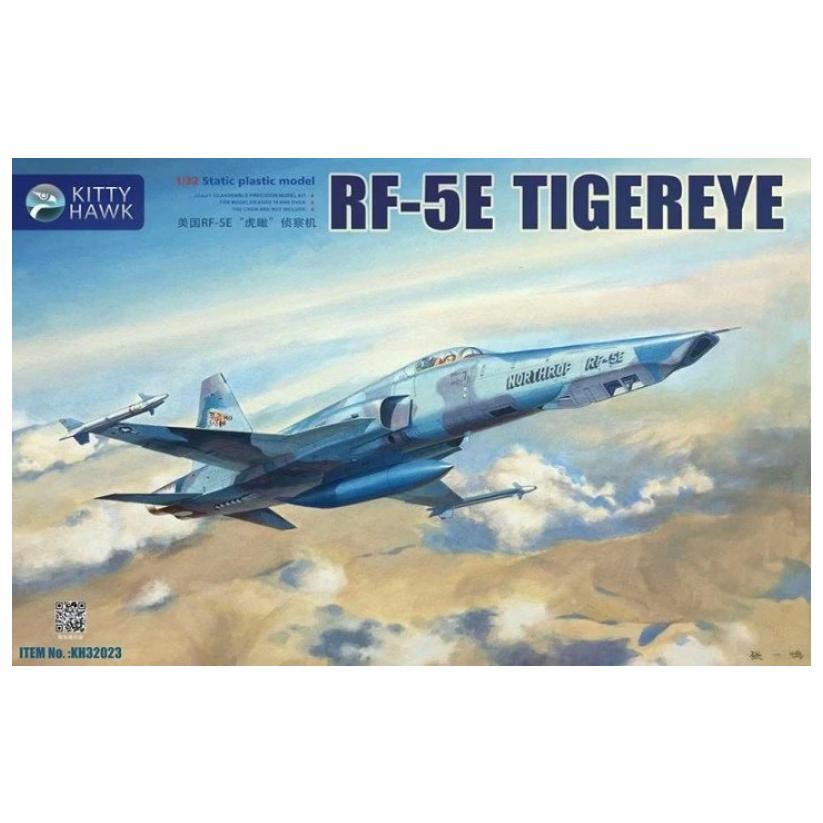

کیت 1.32 Kittyhawk RF-5E Tigereye
30٬000٬000 تومان
توضیحات بیشتر
جنس کیت پلاستیک
بررسی شده تایید شده / شامل دو نسخه کامل F-5E و RF-5E
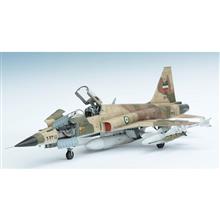
کیت بسیار کامل ، با قطعات اضافه برای ساخت مدل اف5 ای یا اراف5ای کامل ، (نمونه ایرانی اف5ای)
خلبان رزینی
دماغه نوک تیز ایرانی
توپ دوطرف کار شده
جزئیات موتورها کامل
فول لود ، فول فوتواچد
دریچه های دو طرف توپ دماغه باز شونده
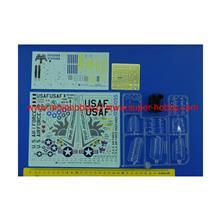
5 آپشن مختلف مارکینگ و دیکال
.
دوستان عزیز در خرید کالا دقت فرمایید . بعلت حساسیت بالای قطعات جنس فروخته شده
Theres something about this relatively small, compact and sleek fighter that can grip the imagination. Ive been enamored with it, that
when Hasegawa released their 1/32nd scale version many moons ago, I made no less than five over a single week, just to show it in some of its endless liveries.
With the release of this version of this famous aircraft, Kittyhawk has not only provided us with a variant never before available in this scale but upped the game considerably over the venerable Hasegawa kit in terms of detail.
Interestingly, the real aircraft has had something of a checkered career. Northrup decided to expand the nose section in order to offer a more effective reconnaissance platform than previously retrofitted standard F-5Es. This resulted in a ten-inch extension to the nose, providing roughly 26 square feet internally for cameras while still retaining a single cannon for self-defense. Unfortunately, this modification upped the cost by almost half, making two of this aircraft about as expensive as three standard fighters. International sales were consequently disappointing, with only 12 actually being purchased. Singapore simply took the same idea and converted eight of its own F-5Es to this configuration, and thats been about it for this variant.
The kit (of course) includes all the parts necessary to make this interesting version but also retains all of the material included in the standard fighter version as well. Add a complete second seat for the F-5F version, and youre going to have some nice material for the spares box. It also includes (although not mentioned in the instructions) photoetch seat belts as well as a nicely molded pilot waving in a friendly fashion, so you have some choices to play with. It also features a very nice instruction sheet with color renditions of the various decal choices.
Throughout the build,I had to contend with the odd molding pin tower showing up in awkward locations something that seems endemic with Kitty Hawk models. However, this wasnt as prevalent a problem as in some other kits Ive made (like their F-86D) and certainly nothing that couldnt be fixed with a quick clip or two. Just keep an eye out and you shouldnt have any trouble.
The first stages of the build feature the cockpit (naturally) and as stated before, you essentially get two ejection seats (1 tiny, easily-reproducible part is all you need to make) so you can actually have either an empty seat with belts or with the pilot, and you can actually interchange them at will, which is kind of an interesting option.
Step 3 features the assembly of the front gear well and cannon bays, and this step gets a bit strange, as they didnt QUITE correct the instructions from the standard fighter kit. They have you supposedly detailing out BOTH bays although clearly only one is used Im not sure what this second bay does in the real aircraft although I suspect its used to avionics. In any case, you can quite safely skip those steps unless you want to scratch that supposed avionics bay.
Step 7 is the assembly of the camera nose, and this is one of those moments of frustration I sometimes have with Kitty Hawk models. The cameras are all includes, but all the detail is on the TOP side of the cameras, which are invisible once the nose is assembled. The bottom portions, visible through the camera windows, feature virtually no detail and I must confess, it would have been nice if theyd included some clear parts for the lenses as well. This whole assembly design feels very much like an afterthought, which is a shame as they could have had some fun with it, like having the camera access doors as separate parts. Q2, which is the tiny pitot tube at the front end, is best replaced with a simple pin, as mine broke just taking it off the sprue, and even the replacement pin was banged off during assembly a couple of times.
Step 9 is the assembly of the cannon bay doors, and this is where you might be a bit frustrated. The empty right bay needed to have the doors closed, of course, but the fit was terrible. Much sanding and filling was required to get them to lie even with the fuselage. I retrospect, if I had been aware of the problem earlier I might have trimmed the doors a bit to fit more snugly before gluing them into position. Just be forewarned.
Step 10 has you building a couple of simple but nicely molded jet engines, and once again, its frustrating that Kitty Hawk makes no provision for displaying these. Unlike some of their other models, theres no trunking leading to these, so cutting out a viewing window in the fuselage would require extensive scratch building to create realistic engine bays. Im not sure why they bothered.
Step 17 offers optional parts to provide open auxiliary engine air intakes, but as there is no detail behind these your best bet is to leave them closed. Step 18 includes the main engine intakes, and there are four very visible pin marks on the inner face of each of these. Be sure to fill these before final assembly, otherwise, the included photoetch grills are going to look a bit out of place, detail-wise. The engine exhausts are also assembled here, and you might want to glue the inner faces to the fuselage at this point, as the outer sleeves can just slide on at a later stage. I assembled mine as complete pieces and found that I have to shave a small portion of the inner sleeves to make them fit. Oh and be sure to fill and sand them too not a particularly easy process.
Steps 19 and 20 feature the assembly of the main gear bays, and you need to pay VERY close attention, as I reversed parts A24 and A35, with some patch-up work required later in assembly as a result. Step 21 has you assembling the tail fin, the design of which leaves a rather strange seam on the one side that needs to be filled in and sanded. I think they could have had the insert run along a real panel line fairly easily to avoid this awkward fit, but . . .
Step 22 has a SERIOUS error that I failed to catch until it was far too late. There are a couple of panels under the nose for the cannon bay shell ejection ports. Obviously, the unused bay shouldnt need this, but I couldnt find any reference to a replacement part anywhere in the instructions. It wasnt until Id pretty much cleaned off the sub-sprue Q that I found the missing part Q14 which is supposed to replace the standard part on that side of the nose. Just be aware of this mistake and dont get stuck like I did.
Steps 25 through 30 feature all the ordinance available, and frankly, most of this is going straight to your spares box, as a reconnaissance aircraft is typically only going to carry tanks and minimum defensive weaponry. Ultimately, I set my aircraft up with three tanks and some early-model Sidewinders as its only ordinance. If your version doesnt need the outer pylons youll need to fill the holes in the outer wing panels.
Despite the fact that as of this writing there are only 20 of this aircraft in existence, Kitty Hawk has really done a really good job of providing essentially every scheme available for their decal sheet. As a lover of smaller air forces, I opted for the Singapore scheme, and really, really like the final look of this sporty little jet.
So, in the final analysis, what do I think of the kit? Well, in terms of detail its got the old Hasegawa rendition beat cold, coupled with the fact that its currently the only 1/32nd scale model of this particular variant available. In terms of ease of build, though, its definitely more of a challenge, but there really isnt anything here that should deter any modeler of middling capabilities. In the end, the final product is the ultimate determinant, and this model looks every bit the Tigereye that Ive seen on the internet. In fact, Ill probably be picking up a couple of copies of the standard Tiger II kit from Kitty Hawk to round out my collection. My heartfelt thanks, as always, to IPMS/USA for a chance to add this interesting model to my collection and to Kitty Hawk for letting me take a shot at this excellent kit.

